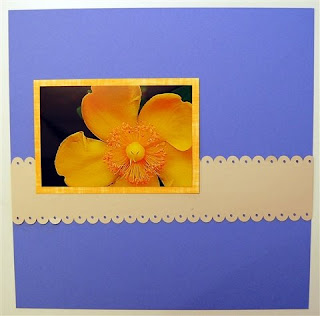
One of the members of the Cricut message board asked me if I could design something similar to a border punch made by Fiskars called "threading water." This punch creates a scalloped edge with a small hole in the center of each scallop. It seemed like a simple task, however, I discovered many complications due to some limitations of the software and the machine.
In order to design in an orderly manner I calculated that each scallop should be 1/2 inch in diameter. The holes in the center should be 1/8 inch in diameter. So, I created a square that extended beyond the left, bottom and right edges of the cutting mat and placed it 3/4 inch from the top of the mat. Then I welded 1/2 inch circles to the top edge of the square, taking care to place them precisely at one half inch intervals on the "x" axis and at .5 on the y axis. The boxes in the "Shape Properties" area at the top right of the screen can be helpful but it is very difficult to get the program to accept smaller dimensions when you are adjusting shapes - if you try to type in something smaller than .5 it will revert to .5 so the only way to get it smaller is by using the "handle" in the lower right corner of the image which enlarges or reduces it and to watch the box for the size you want.
I first designed this in George on the baby bug mat. There is a problem if you want a 12 inch border - the machine will not cut the full length of the paper. An area of between 1/4 and 1/2 inch at the start of the cut and a slightly smaller area and the end of the cut will be in the "uncuttable" area of the mat.
 top left (start of cut)
 top right (end of cut)
In order to get a full strip of bordered paper you need to use the 24 inch mat on the Expression.
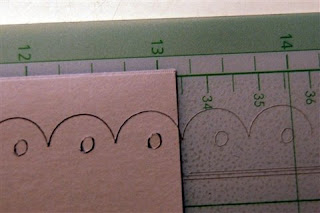
I also was not pleased with the small holes - while the program showed 1/8 inch circles they did not cut as perfect circles as you can see in this photo which shows the holes next to an one eighth hole created by a hand punch - the cricut cuts look like ovals and are not as large.

You can hand trim and try to add a few punches (which won't match precisely) or, if you have the Expression as I do, you can move on and try to figure out a way to get that full 12 inch border to cut!
So I redid the file in both George and Plantin Schoolbook since those who own the Expression would have that cartridge but may not have George. In order to avoid the problem of the cut starting in the "uncuttable" area, I added a few more circles to the designs and placed the paper one half inch into the mat. When I test cut this time I found that the cut started incorrectly - there was a "tail" before a full scallop cut and the final scallop was cut off, as you can see below.

top left - start of cut

top right - end of cut
The next photo shows the difference between the 1/2 inch mark on the mat and the start of the cut after I moved the paper for another trial cut (the scraps are positioned on the one half inch and the 12 1/2 inch mark).


Finally - I tried again and started from a bit beyond the one inch mark, using the scrap cut from the original cut to place my paper

As you can see, the paper is a bit beyond the 13 inch mark but the scallops are complete on each end

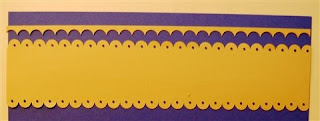
Here is a completed strip with two scalloped edges

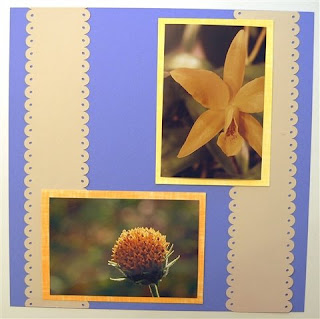
and an example of how these could be used on a layout

I am not entirely happy with the way the machine and the program seem to give you exact dimensions to work with but they don't completely align in reality. The only answer is to do some trials on scrap paper and figure out what works for you on your machine.
Obviously, if you want this edge on a smaller sized piece of paper you will be able to cut it by checking your test cut and placing your paper to align with the exact position of the scallops as cut. I am not sure if the "ovalness" of the small holes is due to their small size - mathematically they should be circles but perhaps they are too small for the Cricut to retain the roundness.
I am posting several variations of the files for you to try - on the smaller mat and the 24 inch mat using both George and Plantin Schoolbook. Test them out for yourself and see if you can make it work for your borders.
Scalloped Punched Border - 12 inch mat - George
Scalloped Punched Border - 12 inch mat - Plantin Schoolbook
Scalloped Punched Border - 24 inch mat - George
Scalloped Punched Border - 24 inch mat - Plantin Schoolbook

I am not sure why this didnt cut circles for you! the cricut is capable for cutting perfectly round circles...I cut out some that were under 1/32" and they are perfectly round. I have noticed that sometimes CDS intermittantly distorts things a bit when cutting. This is a super neat border though!
ReplyDeleteSarah
I haven't had a chance to DL your .cut file or try to make one of my own, but I think it looks great. If you hadn't mentioned any wonky circles or ovals, i would not have even noticed!
ReplyDeleteI think you did an awesome job!!!! As usual. Thank you for so generously sharing.
ReplyDeleteGreat job, again. Thanks for sharing.
ReplyDeleteEileen
Thank you so much for this file. It is great. I cut it out and took my smallest scissors and completed the end circles and it is fine. I think you are too hard on yourself about the little circle/dots. I don't think they are that noticeable, but maybe because you were making it for someone else you wanted it perfect. I love it!
ReplyDeleteAlso thanks for the 2.5" scallop circles. You are very talented and very sweet to share your patterns. Thanks again.
Sandy
[tx-nana-scraps elsewhere. :-)]
Hi Diane,
ReplyDeletethank you so much for sharing your designs, I like them a lot and I'm so happy with the scalloped punch border, because I love this design! You're the best!
Thanks from The Netherlands,
Saskia Haringa
Oh-These are wonderful! Thank you for sharing all your hard work! I will find many uses for all these scalloped borders/mats!
ReplyDeleteLinda
Thank you for sharing your files. Your hard work is appreated.
ReplyDeleteGwen