Monday, June 30, 2008

Cub Scout Frame


A Cricut Message Board member contacted me because she was having some trouble adapting my Eagle Scout Frame (see post on April 5th - LINK HERE)

I revised the frame and sent it to her but I thought that there might be many others who would be interested in this version of the frame (after all there are many more Cub Scouts than Eagle Scouts) so I am posting it today for others to use.

Please use the link above and read the directions on the placement of the paper to make sure that your cut works correctly with even outer bars around the frame.

Cub Scout Frame

Wednesday, June 25, 2008

Fun with Glitter Cardstock


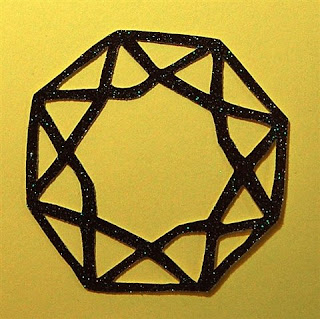
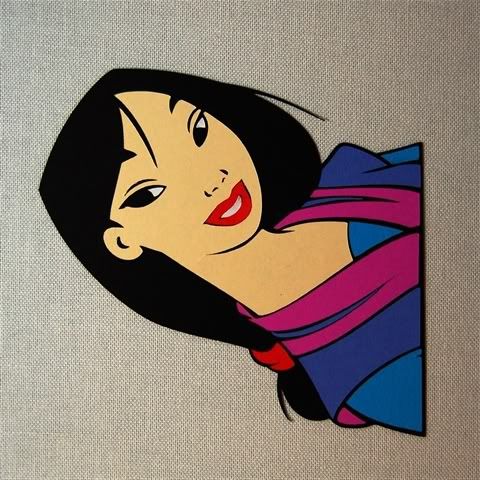
I was looking through the designs on the Happily Ever After cartridge, thinking of doing another Disney character, when I spotted this faceted gem cut and my mind started turning. I had just cut a title from glitter cardstock (DCWV stack) and had been using my Stickles glitter glue - I guess I had glitter on my mind! I thought that this would be fun to do in two or more colors....so I tried it!

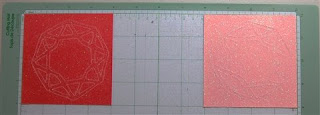
I set the cut up on Design Studio - this is not technically necessary since I used the design exactly as it appears on the cartridge. I just like to use the software so I know exactly where to place my paper and also how large a piece of paper I need for the cut.I set up a red and a pink piece of cardstock to cut in opposite corners.


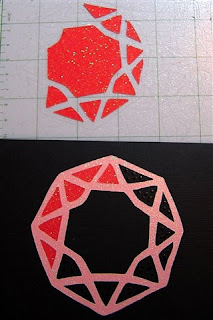
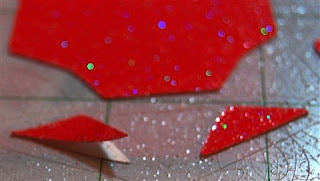
Here is how the red one looked right after cutting - I used the multi cut feature and cut three times - blade depth 6, pressure at 4 and speed at 1. This glitter cardstock creates a lot of "dust"


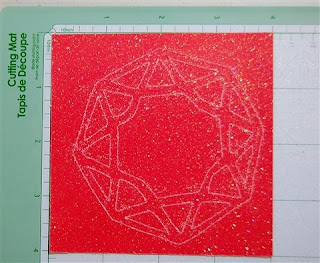
You may be able to see the dust more clearly in this close up photo after the outer piece of cardstock was removed


I carefully removed the outer frame using my handy scraper


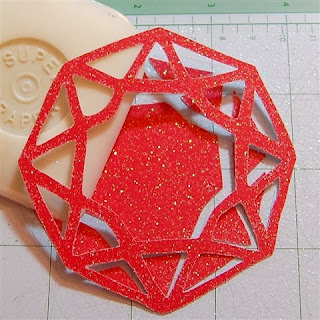
The goal is to lift up only the frame, leaving all of the other small pieces on the mat.


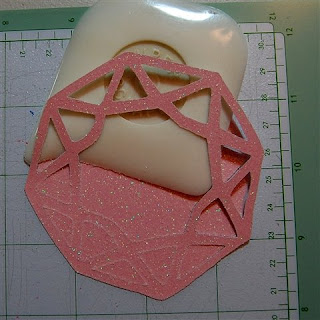
When you have removed the frames, flip them over and mark the top as I did here - this step will save you a bit of time later. (The "T" shows at the bottom of the flipped frames).


I then used my Creative Memories Precision Point adhesive and adhered these frames to black notecards.


When using this adhesive you should dot it on and then wait for it to turn from white to clear - it will then stick down very nicely with no oozing of glue. Once these frames were stuck down, I dotted glue in the openings of the frame


I then followed the rotation of the smaller bits and inserted them into the frame of the opposite color. By leaving the small pieces on the mat it was very easy to work my way around the circle and fill in with the correct piece (they fit perfectly with a smooth finish once they are set in).


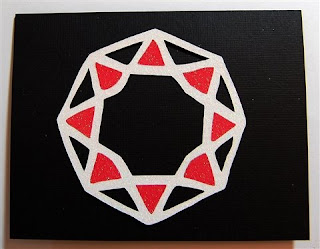
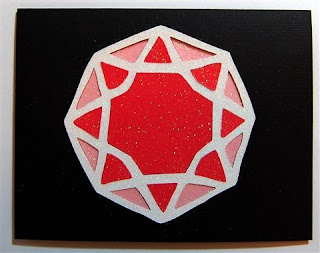
Here is how they looked when I finished with that step


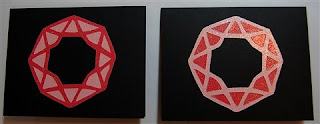
Finally, I added in the centers (but did not glue them yet - I was starting to think of more variations!)


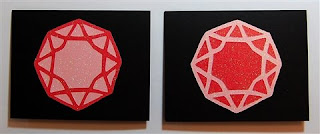
I decided to cut an additional set of frames in white and red again so I could do some experimenting.

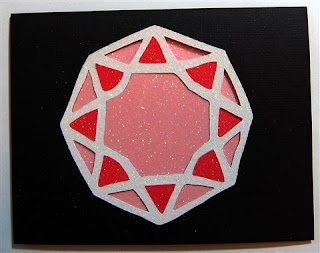
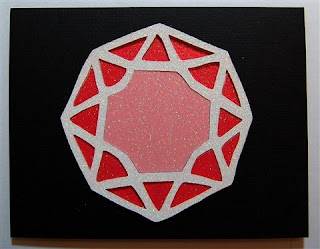
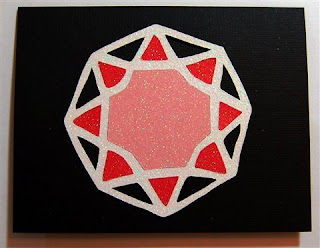
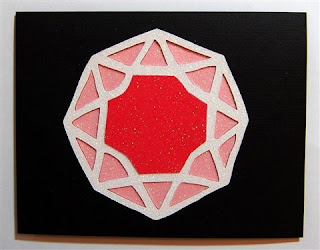
Here are the two cards with a white center substituted for the pink or red one


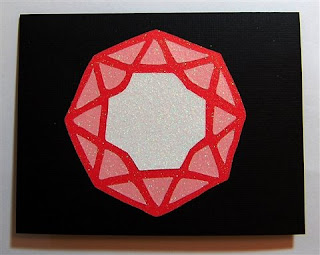
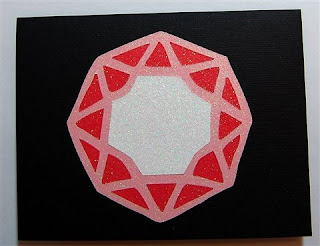
Then I started playing with all of the various combinations - I still have not finished these cards - I am debating on which version is my favorite! Here are just a few of the possibilities...


Be careful when you remove these triangular pieces from the mat - this cardstock tends to separate into layers and to avoid having to glue it back together you should use a gentle touch to peel it off the mat!


It will be fun to try this in other color combinations - I think I will next try to use the "brown" version that came in the glitter mat stack!


Now - maybe I can get back to choosing another Disney character to layer!

My first Disney character - Mulan!


Disney characters and other complex layered cuts are easier to do when you use Design Studio. You can set up the entire mat with pieces of the appropriate color paper for each layer cut. This saves time in the cutting and puts everything at your fingertips for assembly.


This was my first attempt at making a Disney character - Mulan, from the Happily Ever After cartridge. I first set up the base on the left side of the mat using a size of 5 inches. Leaving the size at 5 inches, I then used the various function keys and shift key to get all the layers that needed to be cut. It is important to keep the size slider in the same position as the cartridge is programmed to make the layers proportional in size to the base layer.


Here you can see the feature keys that are used to make the layers.


The slider should remain at 5 inches for all the pieces that need to be cut - this shows the key selected for the magenta part of her costume (bottom row, fifth from right).


Above is a close up view of the placement of all of the pieces to be layered for the Mulan head and below you can see my mat set up to cut these pieces - by using the grid you can approximate the size of each element and stick a piece of the appropriate color paper in the area where that element will be cut.


This is a great time saver and you can leave each set of pieces on the mat until you are ready to add them to the base so you are less likely to lose some of these small bits!

Tuesday, June 24, 2008

Another ATC


This was the second month of the ATC (artist trading card) swap I am involved in through the Cricut Message Board. The theme this month was "flowers" and I originally thought I would cut some flowers with my cricut for the card. But, I had a change of heart....

I have been wanting to do more with my photography and I love to take photos of flowers. I decided to use one of my photos and find a quote that I liked to superimpose on the photo. I had been to the campus of Brown University in Providence, Rhode Island, in April and there were some wonderful beds of daffodils that I photographed. I scanned through all my photos and this one appealed to me


I knew that some cropping and editing was called for to make it suitable for what I had in mind. First I cropped the photo and cloned out the white daffodil off to the right and the very distracting yellow daffodil behind the clump of white daffodils that I wanted as the focus of my photo using my Creative Memories Memory Manager software.


I then transferred the image to my Creative Memories Storybook Plus digital scrapbooking software to create and place the quote on my photo. I can use any true type font in my computer with this software and I chose "Mistral" - it just had the right "feel" for this quote and photo.


I received all of the other ATCs in the mail yesterday and they are wonderful - if you would like to see them they are posted on KER's blog (she is the host of our swap). If you would like any information about the software I used you can check out my CM website (linked in the side column) or contact me directly using my gmail account (also listed in the side column).

More .cut files are coming soon (just have to test cut them and take photos), but, in the meanwhile, I wanted to share this little project and I will continue to post the ATCs I create each month as we progress through the swap - July's theme is "ribbon" and I am trying to decide what to do...

Saturday, June 21, 2008

Even more Beautiful Hearts


Here is the last one of these for now - I added four small hearts at the four compass points to make this lacy background.

Here is a photo of the mat after the cut is finished


Remove the outer area of the cut and the mat will look like this


The off cut you have removed will look like this - you could use this for another page


Work very slowly and carefully - this is quite a delicate cut, you will be able to remove the lace without tearing it if you take your time.


You can see my "super scraper" on the table - I use this to loosen all delicate cuts.


One more photo of the cut on a red background - I just love this heart!


Eight Beautiful Hearts (and four small ones)

Eight Beautiful Hearts


Yet another variation made from the beautiful heart on the Wedding cartridge. Here I simply added four more hearts in the corners.

I always like to see what patterns the offcuts produce- these are rather pretty (I might put photos in each corner and possibly trim the extra bit left in the outer hearts. I will post a photo if I do a layout with this offcut - just wanted to get these up to share first.

Here are the offcuts in in different color combinations


These are the bits that will be left on the mat - I might try to save these for another project - but perhaps that is too frugal!


Finally, here is another photo showing a lower contrast between the design and the background. Color choices make all the difference!


Eight Beautiful Hearts

Friday, June 20, 2008

More Beautiful Hearts - sized for a card!


I have been busy with lots of personal projects lately, but I finally have a chance to post some of the variations of the Four Wedding Hearts design that I posted last Friday.

Here is the first - it is the same design but made smaller so it will fit on a 5 x 7 card. I did my first test cut on Die Cuts with a View (DCWV) white core paper - because I had a lot of it on hand from a great sale at Tuesday Morning.

Here is how that cut looked on the mat - the white core gets a bit exposed in this delicate cut


When the outer area is removed this is how it looks on the mat - I left it here so you could see the size by the grid on the mat.


I discovered that it is very easy to damage these cuts when using this paper - it tends to separate as you can see where the white spots are showing here


To glue these delicate items down I use my Creative Memories Precision Point adhesive pen. The glue dots on and is white - just let it sit until it is clear and then it will adhere perfectly with no oozing.


Here is the purple cut on two different colors of card - yellow and pink


I cut off the damaged area and I think the remaining piece looks like a butterfly - I should try making a bit of a body for it!


I cut this design again on solid cardstock and I prefer these results - no separation or white core showing!


There was a tiny spot in the center due to a small gap in welding (I fixed this for the posted file) so I added a little blingy heart to the center.


I hope you can use this for wedding or romantic cards. I'd love to see some finished results!

Four Beautiful Hearts - card size