Tuesday, June 24, 2014
Anchor Card - Last day for this set of free images
Today is the last day that the Cricut New England Shore image set is available to use for free. A new set should be up starting tomorrow. Remember, to find the free images each week, go to the Cricut website and choose "Make" at the top of the page. Then choose "Free Images" from the menu bar at the top. They usually change on Wednesdays. The name of the image set and the dates it will be free are listed in the box superimposed on the images.
You don't need to go to the shopping area of the website to get access to the free images. Just log in to the Craftroom or Design Space and you will see the free set available in your account. Remember, it is only there for a week - if you really like the set, you should buy it or check to be sure it is in the Image Subscription and subscribe.
I used all but one of the set of six images on this layout (details about this are HERE if you missed the post last weekend). So I decided to make a quick card with the last image of the anchor.
I made a simple A2 card with two mat layers, the white is cut at 5 1/4 x 4 inches and the navy is cut at 5 x 3 3/4 inches. I embossed the navy layer with the D'Vine Swirls Cuttlebug folder (I think it looks a bit like waves).
This is a very flat card - I did not use foam dots to raise up the anchor image. When I put these pieces together, something seemed wrong to me...
I finally realized that I needed to round the corners of the card base as well - doesn't this look better? I used the rounded corners to coordinate with the curvy lines of the shape behind the anchor image.
I haven't added photos to this layout yet. I am considering the idea of dividing two of the 4 x 6 photo mats into smaller sections. I'll give it another day or two and decide once I have chosen some photos. I am not used to making the page without having the photos already selected.
Here are all of the images (along with the "Cape Cod" title from the Destinations cartridge) used for the layout and the card. I wonder what set will be featured tomorrow - if I had to guess I would say something patriotic with the 4th of July almost here!
My other project today was making a "Lincoln" hat with my young neighbor Cailean for her school project about Illinois. Not bad for for five pieces of 8 1/2 x 11 black cardstock, some ribbon and lots of adhesive!
Reminders about Current Cricut Sales
Here are the other deals offered on the Cricut site that end today. These are affiliate links and I appreciate it very much when you use my links to go to the site and shop. You can always click on the Cricut image in the side column too. Thanks for your support of my blog!
Digital Images are all 1/3 off. If you bought the Explore with the Autoship from HSN, now would be a good time to use your $10 digital download code. Click HERE to see the Digital Images on sale.
Cuttlebug Machines are $10 off - you can see them HERE.
Remember - you can get free shipping within the US if your order is $35 or more - so the Cuttlebug would ship free. Just use the code FREESHIP35.
These deals are available until the 24th of June - that's TODAY!
Today will be a busy day - one of the items on the agenda is a quick trip to IKEA to get a few things I need to finish up with the reorganization of my craft space. I am already enjoying the changes and I have found all sorts of things that I had forgotten!
I hope you have a wonderful day!
Subscribe to Capadia Designs if you would like to have new posts delivered directly to your email.
This post may contain affiliate links. If you purchase a product using the link I may receive a commission. I only participate in affiliate programs for products that I use or can recommend without reservation
Monday, June 23, 2014
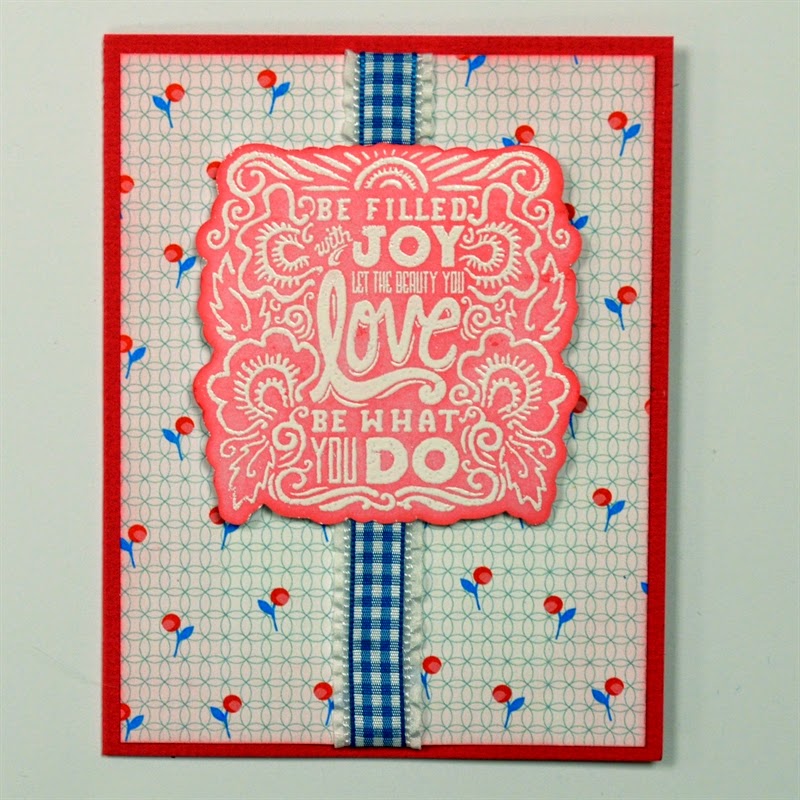
Filled with Joy Card - Special stamp offer ends today
Happy Monday - is your summer off to a good start? We made a lot of progress on projects around the house this weekend. I am excited for my friend Joy of Obsessed with Scrapbooking who is headed to the Close to My Heart Convention at Disneyland this week. She has been a consultant for about a year and has built up a great team and a successful business.
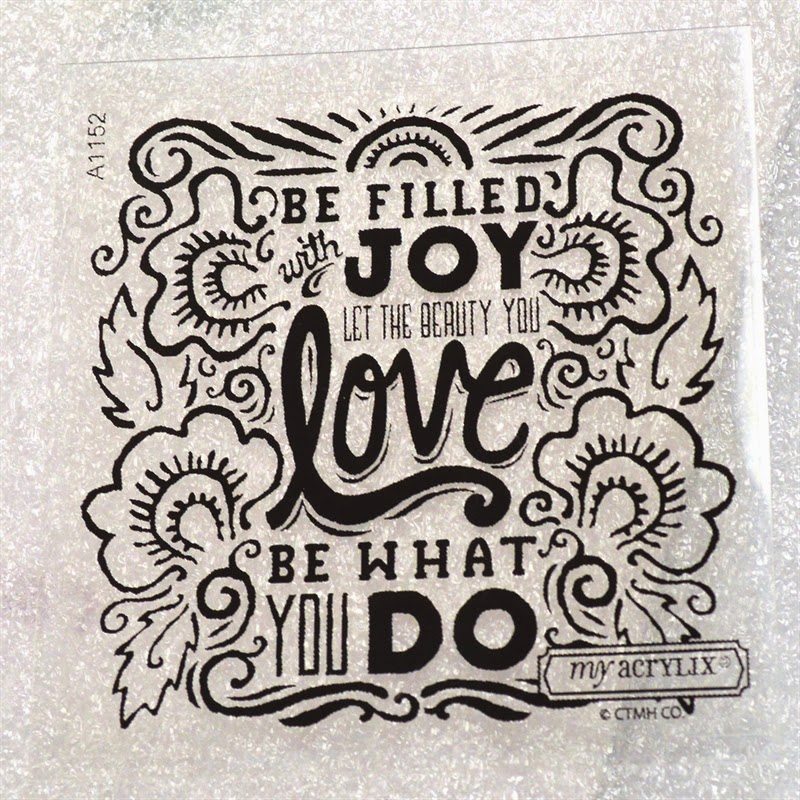
Joy has a special offer that ends today (Monday, June 23, 2014) at 11:59 p.m. If you place an order on her CTMH website, she will send you this great Joyful Wishes stamp for free. Don't add it to your cart - Joy will send the stamp to you directly.
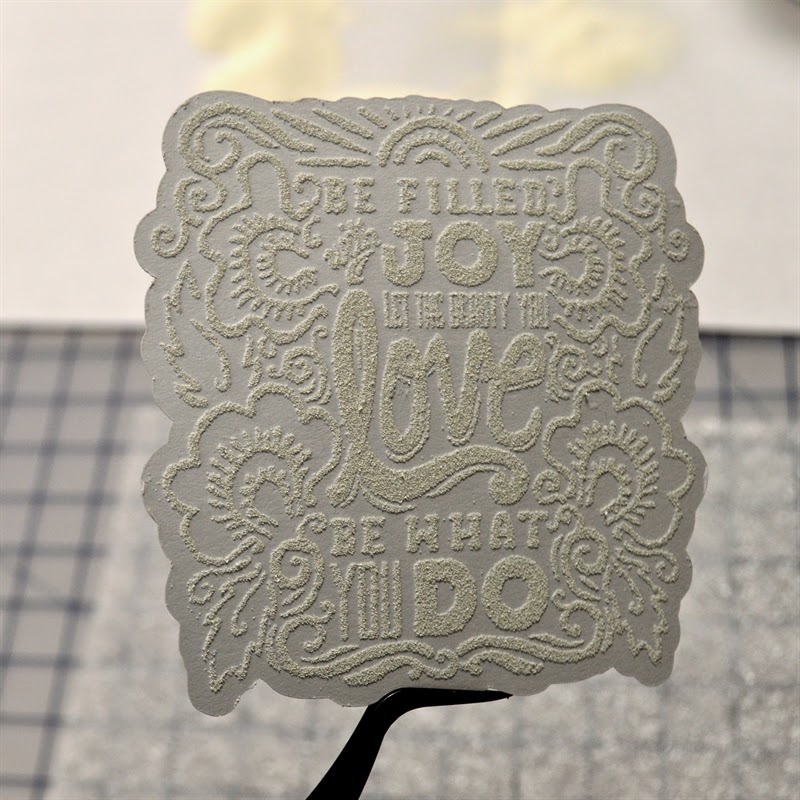
I made a custom stamp mat for the image with my Silhouette software. If you don't know how to do this, click HERE to see the post from April where I gave step by step directions.
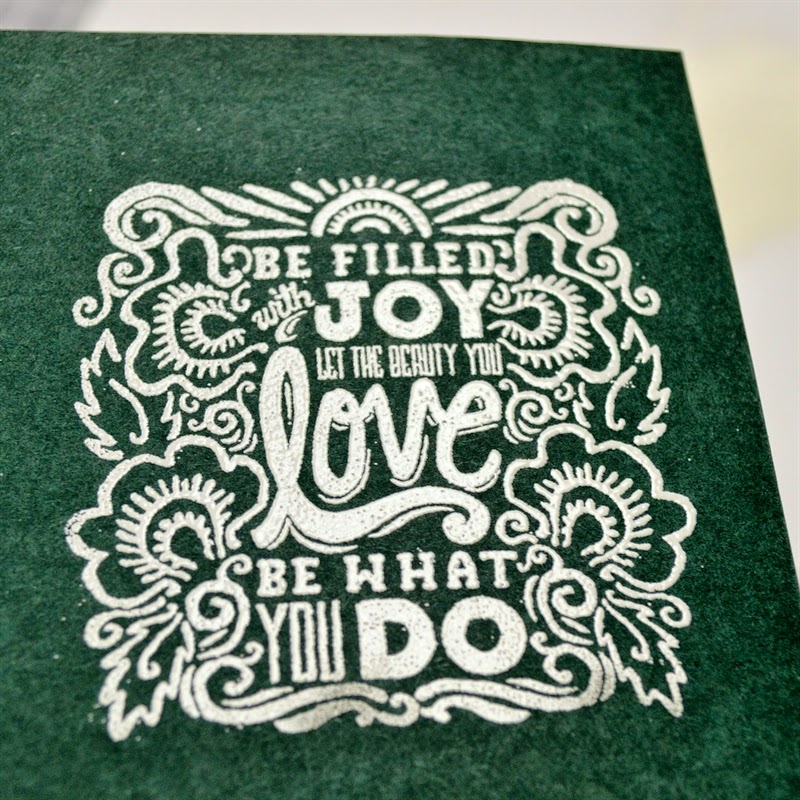
Next, I stamped the image on the mat with Versamark ink and added white embossing powder. I am always delighted with the change from the dull flat look of the embossing powder before you heat it to the beautiful glossy effect after the image has been embossed.
Here you can see how the results after heat embossing the image.
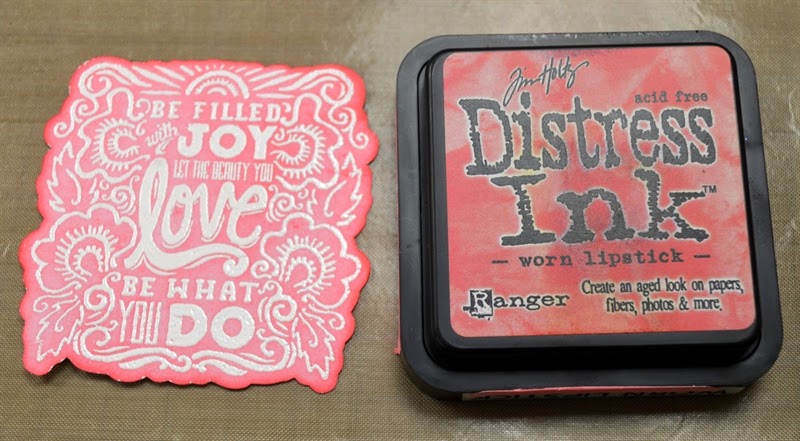
I used some Worn Lipstick distress ink to color the white cardstock, inking from the edges toward the center with an ink blending tool .
I got a little carried away so the color turned out about the same across the entire image. My original idea was to have it much lighter in the middle but I like the way it turned out.
I made an A2 card with some rosy red Bazzill cardstock and added a layer cut from the Fireflies paper in the Citrus Squeeze collection by Adrienne Looman for Webster's Pages. I inked the edges of the layer a bit with the same Worn Lipstick distress ink and added a sheer white ruffled edge ribbon from May Arts down the center.
I added a piece of blue gingham ribbon (American Crafts) down the center of the white ribbon. After both ribbons were added, I adhered the topper to the card base.
Foam dots on the sides of the stamped and embossed image allow it to sit above the ribbon layers. The mat has a "B" on the back because it is not a symmetrical shape. I cut a batch of mats and keep them stored in the plastic envelope with the stamp to make it quick and easy to make another image. It's much easier to line up the stamp when you know which side is "up"!
The card just needed one finishing touch - a bow from the same gingham ribbon.
The bow sits just at the base of the stamped image. People sometimes ask how to tie small bows like this. There are many ways, but I like the "fork" method.
I use an old silver fork that I keep on my craft table. You just loop the ribbon around the tines and cross in the center to tie the ends. The fork keeps it nice and flat. My fork is a serving fork so one side is slightly larger. I like the loops to be slightly different to add more character.
The fork is very pretty with a beaded edge pattern - it is fun to see it with my other crafting tools. I like the easy perfect bows it makes with the tails going in the right direction. (If you want me to post more photos of the bow tying process, just leave a comment and I'll put a photo tutorial together. I'll need to wait until I have an "assistant" to help me by taking photos since I need both hands to tie the bow!)
Here is the final card - simple and cute with an inspiring message.
Don't forget, Joy's special offer is only good through the end of today (or while supplies last, so order early). Click HERE to shop on her CTMH site. Remember, do not add the stamp to your cart - Joy will mail it to you directly.
Just a few more days until our family starts arriving for a quick visit. I'll be combining crafting and cooking most of this week! Do you have any favorite recipes for a picnic/cookout/barbecue party? We have certain family standards but it's always fun to add new dishes! Suggestions are welcome in the comments!
Subscribe to Capadia Designs if you would like to have new posts delivered directly to your email.
This post may contain affiliate links. If you purchase a product using the link I may receive a commission. I only participate in affiliate programs for products that I use or can recommend without reservation
Saturday, June 21, 2014
Cape Cod Layout - Free Images of the Week
Every week, Cricut offers a set of digital images available that you can cut for free using the Cricut Craftroom or Design Space. These are often sets that relate to current holidays or the seasons. With summer arriving Saturday and many people headed for shore vacations, this week's free to cut set from Cricut is New England Shore.
To find the free images each week, go to the Cricut website and choose "Make" at the top of the page. Then choose "Free Images"from the menu bar at the top. They usually change on Wednesdays. The name of the image set and the dates it will be free are listed in the box superimposed on the images. Don't be concerned that it says "Craftroom Exclusives" - these images are available in Design Space (I believe all or nearly all of the digital image sets are included in the Image Subscription).
There are six images in the New England Shore set. I decided I needed a break from furniture moving and craft room sorting (it's amazing how many pieces of half used paper can accumulate when you let it pile up!), so I sat down at the computer and opened the image set in Design Space. There are six images and I cut them all.
I used the colors in the screen images as my guide for choosing papers. My colors don't match exactly (in spite of the stash of paper in my room) and I did end up changing a few from the samples given. I cut the items in sizes that I thought would work on a scrapbook page. The height of the boat is 6 inches, the lighthouse is 9 inches tall, the anchor piece is 4 inches, and the mariner's compass, life saver and helm pieces are all 3 inches in height.
I clicked "Go" in Design Space and kept loading and unloading mats (12 in all) and in a short time I had all of the pieces I needed. By doing all six items at once it was easy to coordinate the color scheme. You can see a few of the pieces that I changed. I wanted my light house to have a red side instead of beige. I also substituted navy for dark gray on a few of the pieces.
Here are the fully assembled pieces. They are easy to put together with the typical Cricut guidelines cut into the shapes to help you line things up. I decided to make my first paper layout in a very long time with these shapes. We vacationed on Cape Cod two summers ago and I haven't done anything with those photos yet so these cuts inspired me to start a vacation book.
As I was planning out my pages, I realized that I needed a title and also found that the anchor piece just wouldn't fit in with my plan for the layout. I decided to save that piece for a card.
I was just going to weld letters together for my title but when I typed "Cape Cod" in the search box in Design Space I discovered that there is a "Cape Cod" title oval in the Destinations Image Set, I thought it was funny to see all of the results with characters wearing capes. The word "escape" also came up in the search but I think it is better to be over-inclusive than to miss images.
The spot I had for the title was 4 inches wide so I wanted the title to be about 3.6 inches to leave a bit of a border. When I resized the oval to 3.6 inches it was only 1.81 inches tall. I wanted it to be a bit taller so I unlocked the aspect ratio (just click the little lock icon, highlighted in yellow above, to do this) and changed the height to 2.25 inches.
Here is the left side of my layout. I created water and waves using my old Creative Memories Decorative Edge trimmer. These were discontinued a long time ago but I imagine some of you might have one sitting in your craft space. I cut a strip of paper four inches x 12 inches and trimmed the long edge. I used the darker blue to make three wavy strips and alternated their direction. When you adhere the strips, you need to allow room for the photo mat to slip inside the bottom wave.
If you are interested in making this exact style of water and don't have the trimmer, leave a comment and I will try to make an SVG file to share.
The mariner's compass makes a connector between the two photo mats. I really like the way the line between the two shades of blue in the star lines up with the edges of the mats. This is the only cut that gave me a bit of trouble. The direction indicators are cut into a circle that is about one inch in diameter so they are super tiny. I made several cuts because most times three of the four would be fine but one letter would get snagged. I think a size a little larger than 3 inches overall would be better for this cut.
The photo mats are all cut at 4 1/2 x 6 1/2 for a standard 4 x 6 photo. I cut a strip of gray cardstock at 4 x 12 inches to put behind the lighthouse and the title to balance the water on the left side page. Changing the beige to red on the lighthouse balanced the red boat on the left page. The helm piece works as a topper for one photo and the top of the wheel just overlaps the upper photo. You don't want any adhesive right at the tips to be sure that a photo can slip under.
This is the two page spread without any photos. I will show you a digital trick for planning how to choose and crop your photos for the layout in another post. The background pages are 12 x 12 plain ivory cardstock. I choose it because it gives a hint of yellow but keeps the page from having a tropical feel. If you had a lot of journaling to add, you could eliminate the lifesaver image and put it in that spot. It is a little odd to have it up there but I thought it looked a bit like a cloud(!).
It was fun to do some paper pages. I am a very simple and "flat" scrapper. I don't like bumpy things on my pages - I save them for cards and other projects. I also don't like to spend hours and hours on making a page. I usually don't use so many die cuts on most of my layouts but the time I saved by using the Explore and Design Space made it easier to convince myself to use nearly all of them. I really like the way images are complete and in color when you are choosing them.
If I can keep things moving along with reorganizing my space - and keep it cleared up most of the time - I will have more room to work on pages. I tend to have my craft island get more and more covered with bits and pieces of projects until I am working in a space about 8 x8 inches! (Does this sound familiar to any of you - leave your true confessions in the comments!).
Here is a tiny view of "before" - the island covered with so much stuff and boxes and shelves in odd places as they move to new locations. I hope to get most of the rest of the things moved this weekend and I may need a quick trip to IKEA to finish up my plans.
Cricut Sales
Here are the other deals offered on the Cricut site this week. These are affiliate links and I appreciate it very much when you use my links to go to the site and shop. You can always click on the Cricut image in the side column too. Thanks for your support of my blog!
Digital Images are all 1/3 off. If you bought the Explore with the Autoship from HSN, now would be a good time to use your $10 digital download code. Click HERE to see the Digital Images on sale.
Cuttlebug Machines are $10 off - you can see them HERE.
Remember - you can get free shipping within the US if your order is $35 or more - so the Cuttlebug would ship free. Just use the code FREESHIP35.
These deals are available until the 24th of June.
Happy First Day of Summer! It has been beautiful here - not too hot and not humid at all. Our fingers are crossed for this to continue for the next week or so. We have lots more furniture moving and gardening to do this weekend. Next weekend we'll have most of our family here for a big cookout party. I am determined to have all of my craft things off the pool table before then!
Subscribe to Capadia Designs if you would like to have new posts delivered directly to your email.
This post may contain affiliate links. If you purchase a product using the link I may receive a commission. I only participate in affiliate programs for products that I use or can recommend without reservation
Wednesday, June 18, 2014
Digital Wednesday
Happy Wednesday! I have been on a more relaxed schedule with summer activities taking some of my time away from crafting. We are will have family visiting in another week and there is a lot to do to get ready. We will get to meet our great niece who was born last September for the first time (she lives in Switzerland).
Welcome to lots of new subscribers in the last few days. I think most of you found me through the Cricut Explore email that went out on Sunday. I hope that you will find lots of help and inspiration here. There have been more emails and other messages than usual but I am nearly caught up. If you sent me a message and haven't had an answer by the end of today, please send it again - things do sometimes go missing.
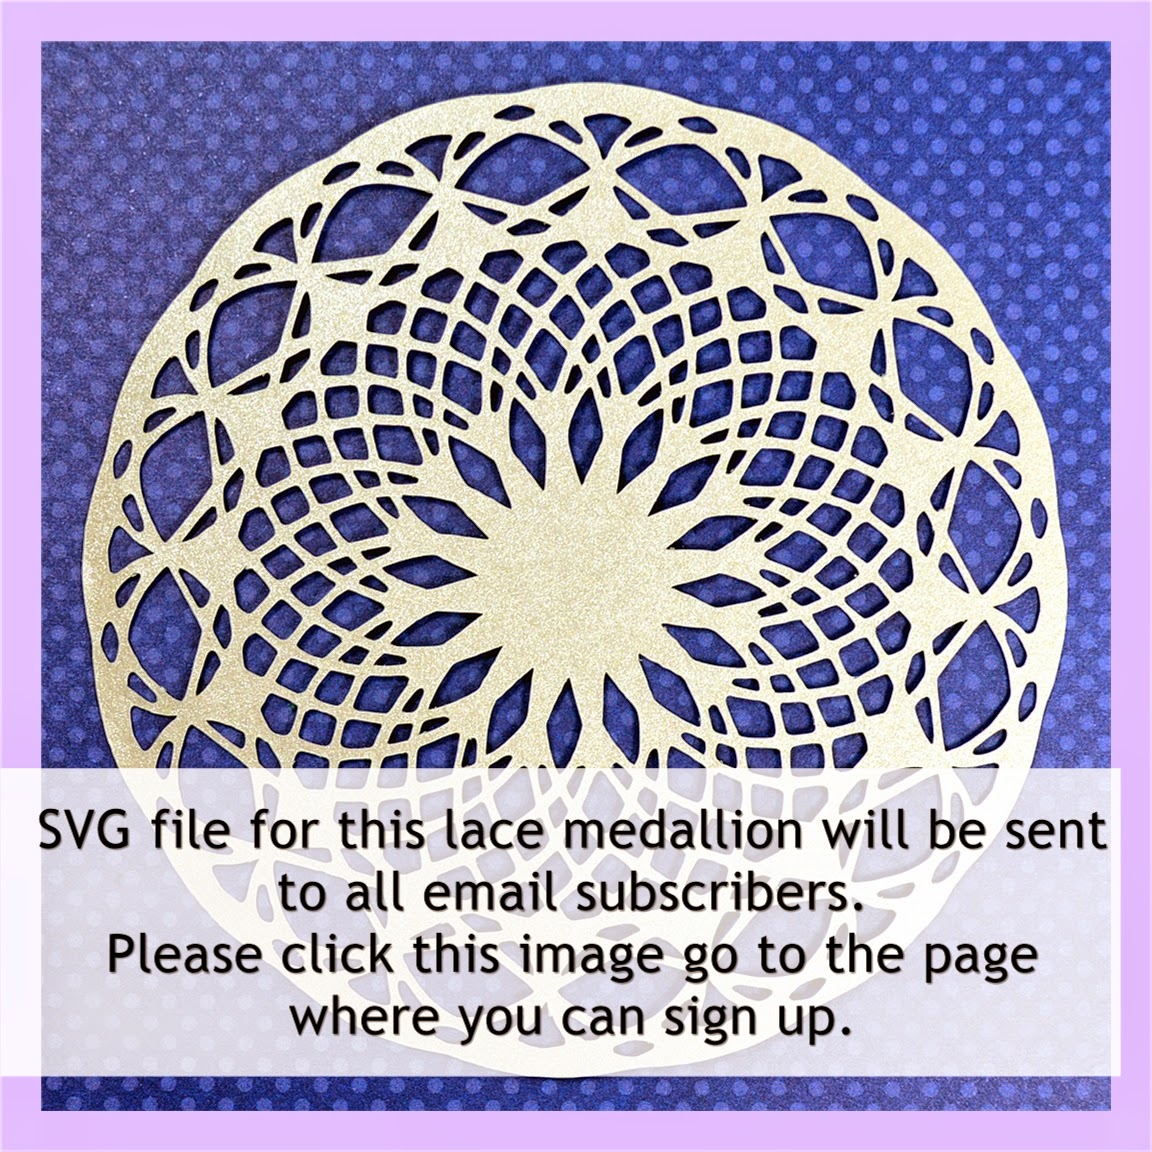
A few people have asked how to use the lace medallion that is a free gift for subscribers. You can use this file on any machine that will cut SVG files. Cricut users will need to have the Explore machine to cut this file. In the blog post HERE I give instructions on how to upload an SVG file to use it in Design Space - if you still have questions, just leave a comment for me.
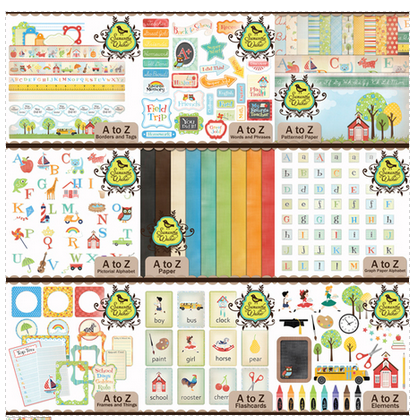
Today is "One Buck Wednesday" at Snap Click Supply (the new home of Jessica Sprague digital supplies). This adorable school mega collection by Samantha Walker is just $1 - the normal price would be $26.99. Click HERE to go to the sale (I am not an affiliate, just a long time customer). You will find this set in the middle of the right column - there are lots of nice things on sale this week. Remember, this sale only lasts for one day - today! Next week there will be new items in the sale.
I use my One Buck Wednesday purchases with my Artisan software (formerly Creative Memories Storybook Creator). You can import the jpeg and png files for the papers and embellishments into a personal art kit. If you have questions about the software or how to import other digital kits to use in the program just let me know. I might do a blog post to help you sort things out - be sure to leave specific questions if you can't find the answer in the software help. If you don't have Artisan, I highly recommend it. The program is easy to use and you can do a lot of interesting things with it. I use it for all of my digital scrapping and also for making cards, invitations and other paper projects.
If you look carefully, you can see that I turned my lace doily design (the subscriber gift file) into a digital image to use for more projects. I also used one of my photos of an iris and created a large layered medallion. The background paper and the center ball are all things that I created using the Artisan program. (I was a Creative Memories consultant and I am now an affiliate for Panstoria - the company that developed the program).
Over the weekend, we started moving furniture around. We took a loveseat to my husband's parents to use in their downstairs TV room. We also turned our pool table 90 degrees and this created much more space (it is in one of the rooms where I craft). Well one thing led to another and I have completely torn up my craft space and I am putting it back together with a lot of changes in the arrangement of the furniture. It's hard work to move everything but I am excited to see the end results. Maybe I'll finally do that craft room video people keep asking for!).
Subscribe to Capadia Designs if you would like to have new posts delivered directly to your email.
This post may contain affiliate links. If you purchase a product using the link I may receive a commission. I only participate in affiliate programs for products that I use or can recommend without reservation.
Sunday, June 15, 2014
Happy Father's Day!
Happy Father's Day!
I found a few favorite photos and put together a quick digital page to celebrate three fathers - my husband, my Dad and my father-in-law. This is the second year without my Dad and we miss him a lot. We were able to see my father-in-law last night and our younger son will be visiting today. I hope that you are able to celebrate this special day with family.
While I was looking at photos, I came across this one from 1961 of my Dad and all four kids - three girls and a boy. I am in the center front. There are not a lot of photos from my childhood so I enjoy looking at the few that we do have. So many photos are taken now that I think they have less impact and value individually (but that is a topic for another day!).
I also came across this project from 2010. Word books were very popular at the time and I designed this "DAD" book for Father's Day. I used the original Cricut Design Studio program to make the book (you can see the full post HERE). A few people have asked me about these books recently. Please leave a comment if you'd like me to do a tutorial on how to make them in the newer software programs.
Welcome to any new visitors who may have arrived at my blog today. If you'd like to keep up with my posts be sure to subscribe to receive them by email. I also will send special updates and subscriber gifts from time to time.
Enjoy the holiday and have a great Sunday!
Subscribe to Capadia Designs if you would like to have new posts delivered directly to your email.
This post may contain affiliate links. If you purchase a product using the link I may receive a commission. I only participate in affiliate programs for products that I use or can recommend without reservation.
Saturday, June 14, 2014
Last Minute Father's Day Cards
Tomorrow is Father's Day. June is such a busy month that it is easy to get behind with projects. If you need a Father's Day card but you haven't had a chance to make one yet, here are two easy cards.
You can make these cards if you have the Father's Day cartridge for the "Super Dad" card or the "Father's Day - Best Dad Ever" digital image set for the Trophy Card. Both of these image sets are included in the Image Subscription. (affiliate links)
These cards also use the free Cricut Craftroom Basics image set.
This set has basic shapes that are very useful for many projects. You can find it quickly by typing "basics" into the image set search box in Design Space. In addition to these shapes, the set contains a full alphabet in a clean and easy to read font.
Her are the pieces for the Super Dad card. The card base is made by welding two of the rounded squares together. I used a Graphic 45 paper from the "A Proper Gentleman" collection for the layer on the card front. I think it looks like a necktie fabric. The top of the badge is cut from textured metallic cardstock from American Crafts. There is also an extra layer for the inside of the card since the card base is dark navy.
Here is the badge image on the Father's Day cartridge. There are several similar images on this cartridge.
In this close view you can see the ridges in the metallic silver cardstock. The word "super" is cut from the top of the badge and I saved it to use on another card.
This cardstock makes me think of the chrome on old cars.
I used some foam dots to raise the badge from the card front. You could make the badge detachable and add a pin backing so Dad could wear it for Father's Day.
The extra layer creates a spot to add your sentiment inside the card - either stamped or handwritten.
https://us.cricut.com/design/#/canvas/project/18076114
I also made a quick file for the Cricut Craftroom (I added the same pieces and resized them to match the Design Space card - I did not test cut this file).
You can download that file HERE.
The second card uses a 5 x 7 card base. The trophy is from the "Father's Day - Best Dad Ever" digital image set and the layering shape is from the Cricut Craftroom Basics image set.
I did not include the card base and the two layers in the file because it is probably quicker and easier to just cut them with your trimmer. I added a third ivory paper layer to frame the patterned paper on the card front on the finished card.
I did add the card base shape to the mat as I planned the card. I used a rectangle from the Cricut Craftroom Basics set instead of one of the canvas options in Design Space. These shapes have a shadow layer so it makes it quick and easy to see how a basic card and mat layer would look. There is an extra shape to use inside the card as a liner for adding the sentiment.
Here are all of the pieces for this card. I used the same lined silver metallic cardstock for the bottom layer of the trophy. The gold top layer is the "Dazzle" glitter cardstock from DCWV. It does not have loose glitter and is very thin - a sort of glitter finish on the paper. This cuts beautifully for fine details like the swirls in the trophy. The patterned paper is also from the Graphic 45 "A Proper Gentleman" collection.
Here is a close view of the top of the trophy - it is very shiny and sparkly but it is difficult to capture the effect in a still photo. I embossed the ivory label shape with a star folder to add a little more interest.
The extra label shape is just right for the inside of the card - just stamp or write your sentiment on it. (TIP - it is a good idea to stamp first and then adhere the shape to the card. If you make a mistake, you can flip it over or cut another shape...don't ask me how I know this!).
https://us.cricut.com/design/#/canvas/project/18074964
I also made a quick file for the Cricut Craftroom (I added the same pieces and resized them to match the Design Space card - I did not test cut this file).
You can download that file HERE.
I thought that these files might be helpful if you are still trying to get some cards made for tomorrow! If you don't have the Image Subscription you can try it for a month for just $9.99. Click HERE to go to the page that explains the subscription. You'll find a link to the list of all of the image sets included on that page.
We have some family plans for the weekend. I hope you get to enjoy some time with family too!
Subscribe to Capadia Designs if you would like to have new posts delivered directly to your email.
This post may contain affiliate links. If you purchase a product using the link I may receive a commission. I only participate in affiliate programs for products that I use or can recommend without reservation.
Subscribe to:
Posts (Atom)


